Archiving allows tutors to manage their students with a greater level of ease and convenience, making your lives easier. Archiving a student will remove them from the messages section of your account enabling you to keep your current students in one place without mixing them with previous students or students you have never taught but only messaged.
You are able to archive your students through both the Tutorful app and the website, and by including some helpful screenshots, this article will demonstrate how this will work.
Apps
Step 1) Go to the messages section of the student you wish to archive.
Step 2) Select the green plus button in the bottom left corner, which will give you the option to view your lessons, archive or report your student. You can also find the option to archive by going to the student profile icon panel in the top right corner of the previous screenshot, and selecting ‘Archive student’.
Step 3) You will then be asked from one of the following lists to select a reason to archive your student. The first list is for new student enquiries, whilst the second is for students who have had at least one confirmed lesson with you.

Step 4) Once your student has been archived, we will send them a message to let them know that you are no longer available to tutor them and they will be removed from your messages.
Website
Step 1) When archiving a student through the website, you’ll need to go to the messages section and select the ‘i’ symbol on the right hand side.

Step 2) Upon selecting ‘Archive’, you will be prompted to select a reason from the lists below. As is the case with the apps, the website version is no different - the list on the left displays archiving reasons for new student enquiries, whilst the list on the right will appear when archiving an existing student.

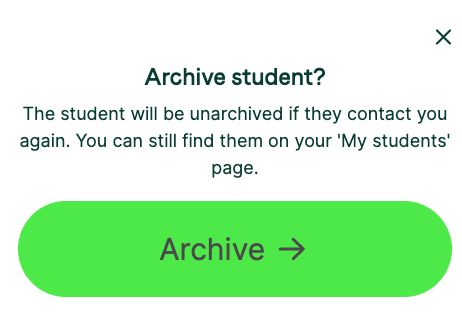
Step 3) Once you have selected a reason for archiving, you will be asked to confirm by selecting the green ‘Archive’ button. As mentioned in the pop-up message, the student will become unarchived if they contact you again, and you can still find them in your ‘My students’ page should you need to.

Step 4) You are also able to archive a student when responding to a lesson request. When viewing the request, you’ll see the option to ‘Reject and archive’, and upon selecting this, you’ll be prompted to select a reason from one of the two lists shown in step 2 depending on whether you have had a lesson previously or not.
There's just a couple of things to note about our archiving system:
- Even if archived, students will have access to the message thread, and a new message from them will unarchive the relationship.
- If you ever accidentally archive a student you’ve not had a lesson with, or have selected the wrong reason for archiving, please contact our Engagement team, where we will happily resolve the situation for you.
- If you mistakenly archive a student you have had a confirmed lesson with, you can still contact them by going to your completed lessons and selecting the messages, or by finding the student in the ‘View students’ button, seen in the top right of the messages page. This will not result in the student becoming unarchived however until the student messages you back. If you do require that the student is unarchived immediately, please contact our Engagement team.
